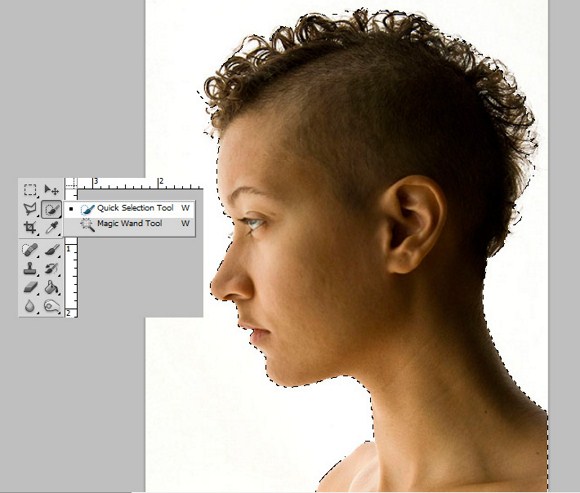
One of the most difficult and frustrating tasks in Photoshop is making a clean and decent selection on photos that involve super fine hair, fur, leaves, and any fiber like elements. When using the standard selection tool or the masking process, you may able to accurately select smooth edges. We may use the color range tool and the tweaking of levels and channels to select much difficult areas but that would also take too much time on manipulation and very complicated to follow.
The good news is that, PS5 or Photoshop CS5 has a tool called the QUICK SELECTION tool. This tool also includes a very powerful sub tool called the REFINE EDGES tool, using the refine edges tool will greatly help and speed up editing tasks especially when you need to select out the hair or fur on subjects.
For example, we have here a wonderful haircut. And then you want to cut out the background so that you could use another image as background or import the image to another document without having the white parts included.

Normally we would start at the marquee tool. If that proves too tedious to do, we then proceed to using the magic wand, masking, and other selection techniques and so on. However we can use the QUICK SELECTION tool which can be accessed by right clicking the Magic Wand tool. In using the quick selection tool, it is just simple as LEFT clicking + Drag. You may take time to learn how to handle this tool. Basically it is just simple as using a normal brush.

Now when you have selected the necessary parts, find the Refine Edges option found at the right top area. Click it and then a panel for options will appear. Here you find that the panel offers options to view the selection in marquee or running-ants appearance, in overlay or masking mode, on black or white background, on black and white or silhouette, and etc. to check the selection, you may want to choose the on black background for now.
On the strip image below, you can that I am using the black and white as the view mode, because we can clearly see the effectiveness of the tool. Now, apply 1 radius to Edge Detection, enable or check the Smart Radius. Apply on the hair to further improve the selection. Click OK to apply, and check by changing the view mode.

After that, we can now remove or apply a masking layer to remove the background. Choose masking layer to prevent accidental deletion. Once the background is removed, apply a gradient background or anything you like to see if the technique really works. If not satisfied with the result you can always try using the other options such as changing the smooth, feather, contrast, and shift edge under the adjust edge on the refine edge options.


No comments:
Post a Comment